.jpg)
Information Design / Bachelor of Design in Creative Media
Project 2: Animated Instructable poster
Index
1. Instructions2. Project 2
3. Feedback
Project 2
Use the assets from Project 1 Instructable Infographic poster into a 60-second motion graphic. Once again, capture the aesthetics and narrative of the poster with movements, SFX, and music.
Requirement:Max 60 seconds infographic video 720p: 1280x720 pixels (H26/mp4) published on YouTube (set to Unlisted).
Research
In the week 4 class, Mr. Shamsul shared reference videos created by our seniors to give us an overview of what Project 2 entails. These videos provided a general understanding of the project's direction.
 fig 1.1 My Project 1 outcome
Based on my Instructable Infographics poster in project 1, I discovered some design styles online that are relevant to creating a video.


 fig 1.2 - 1.5 References
The overall style of my video will be minimalistic, avoiding excessive elements. The graphics will be flat and presented step by step, with each step on the left and a corresponding example of the baking process on the right.
SketchesIn the week 4 class, I sketched out the scenes for my video to plan the content for each part. This preparation allowed me to begin creating my slides in Adobe Illustrator before animating the elements.

 fig 1.6 - 1.7 My video scene sketches
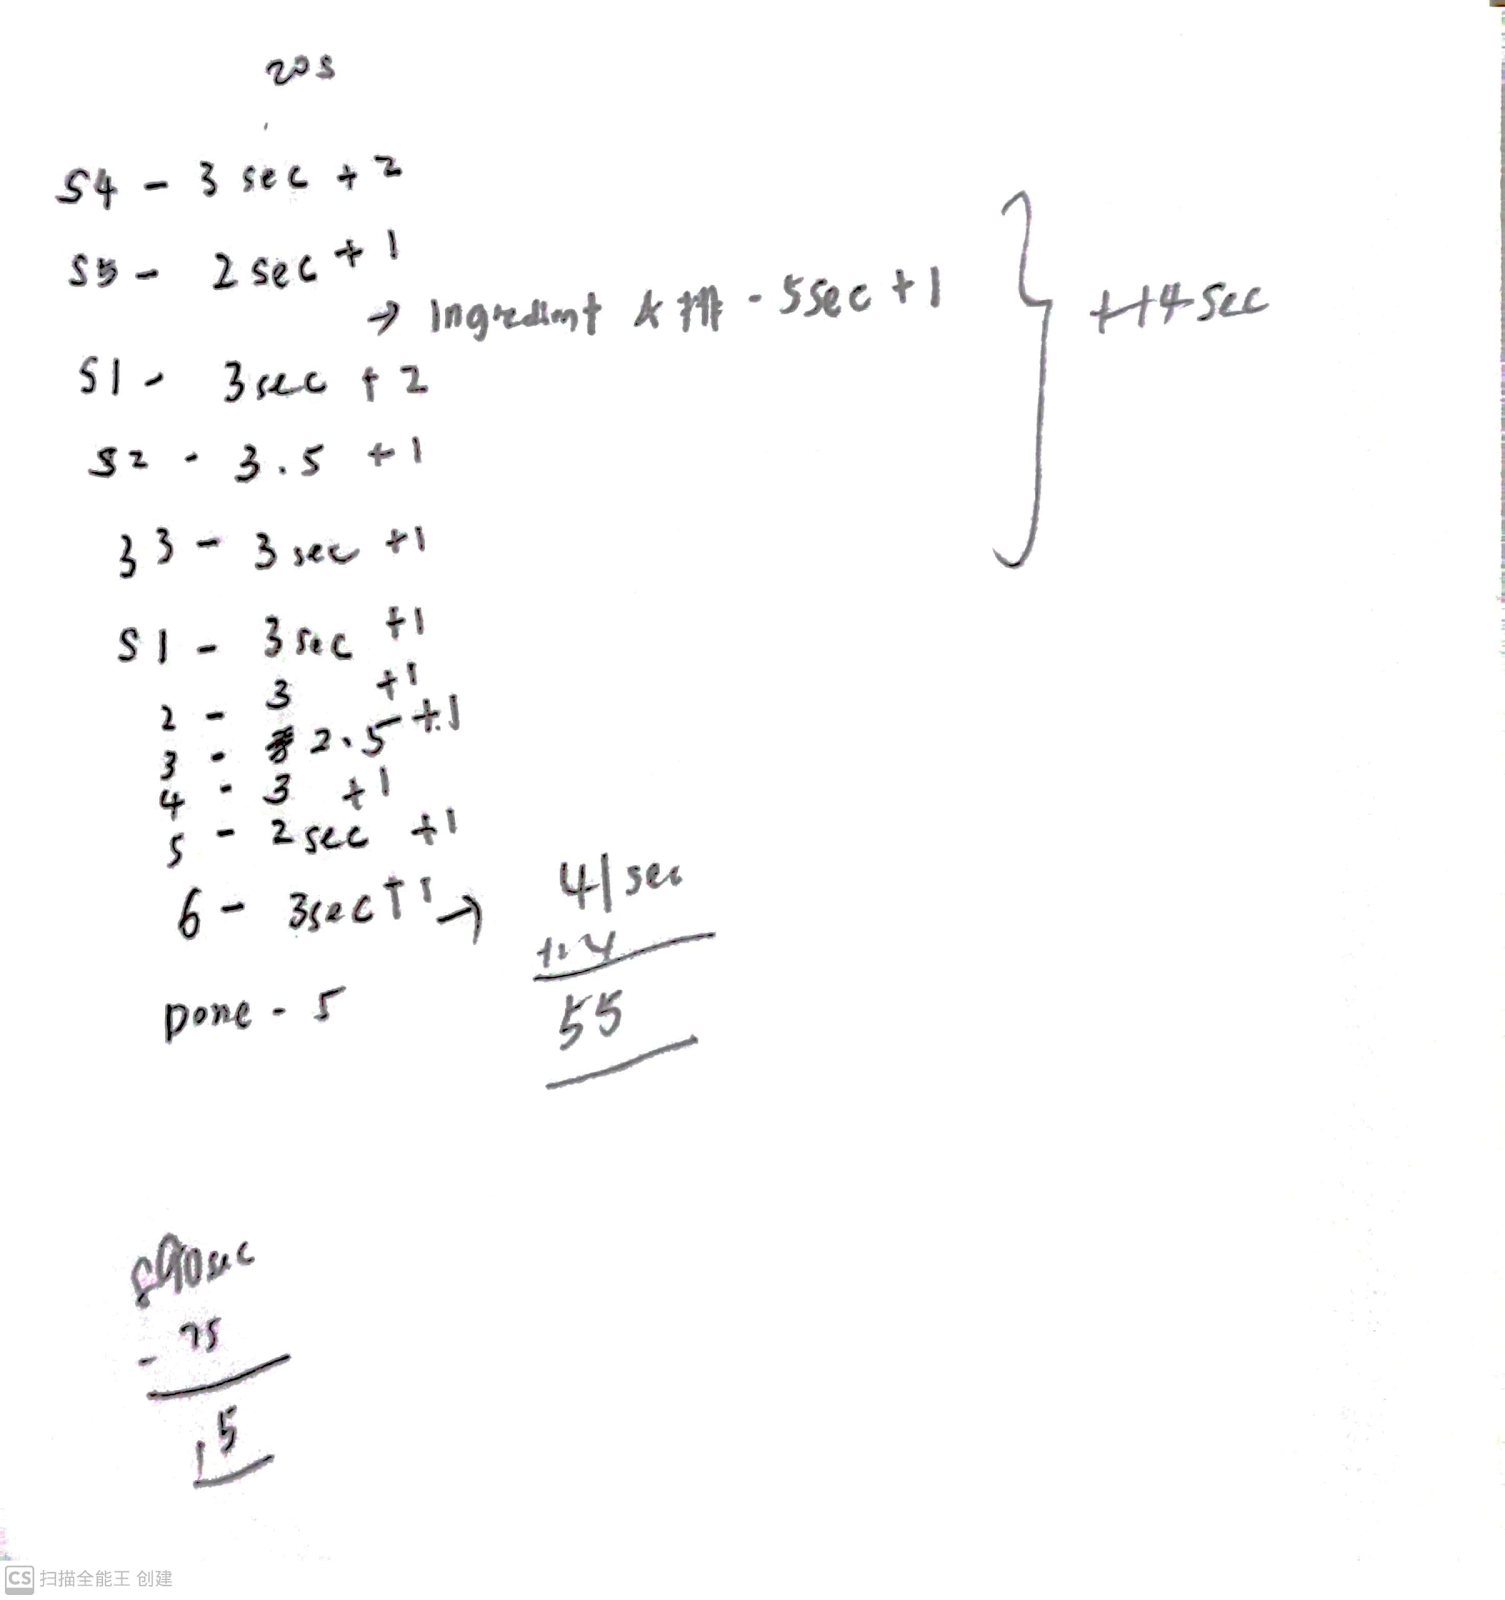 fig 1.8 Estimate duration of every scenes
I estimated the duration of each scene and observed that if the maximum duration for the video is 1 minute, most of my scenes would only have 2 to 3 seconds, making the progress very fast. I brought this concern to my lecturer, and Mr. Shamsul suggested extending the entire video's maximum duration to 1 minute 30 seconds.
Graphic scenes (Adobe Illustrator)First of all, I crafted all the required scenes using Adobe Illustrator.
 fig 1.9 Files saved
Then, I saved each scene as separate AI files in my computer.
 fig 1.10 Steps layout
I opted to tweak the layout from my initial sketch. I believe a left-right layout is more effective than an up-down layout, providing more space to incorporate information.


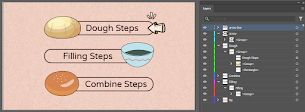
 fig 1.11 - 1.14 Scenes with layers progress
Besides, on each slide, I must organize all the elements into layers because I will later import the files into Adobe After Effects for animation. Without separating the graphic items appropriately, animating them would be challenging.
Animation (Adobe After Effects)Next, I created folder in Adobe After Effects and import all of the AI files into it.
 fig 1.15 Folders in Ae
I organized my work into three folders. The first folder contains pre-compositions for individual scene animations. The second folder is composition which will house all the animated scenes for the final version. The third folder comprises graphics for each scene, separated into layers.

 fig 1.16 - 1.17 Animation progress in Ae
In the image above, I displayed the progress I made in Adobe After Effects. I utilized the scale function (0% > 100%) and opacity function (0% > 100%) for most graphics items. For pouring actions, I adjusted the position and employed the rotation function.
 fig 1.18 Text animated
For all the text which describing the steps, I implemented the new mask function to make them appear from left to right.
 fig 1.19 Final version in Ae
Lastly, I merged all the animated scenes into the final version, ensuring a smooth flow without any occurrence of a black screen.
Sound editing (Adobe Premiere Pro)After I export the video from Adobe After Effects, I import it into Adobe Premiere Pro for adding sound effects on my video.
 fig 1.120 Sound editing progress
I incorporated the background music on audio track 1, using the song "Sitting in a Café" because it is a relaxing tune that complements my video.


 fig 1.21 - 1.23 Sound effects finding via online
I had found the sound effect via online. The website that I used for finding the sound effects:
 fig 1.24 Progress on Pr
After I insert the sound effects, I started doing my editing progress. I placed all of the relevant sound effect into the audio tracks. For certain parts where I couldn't find a suitable voice online, I made adjustments to the sound effects using the following steps:
- Premiere Pro → Audio Effects → Pitch Shifter → Semi tones.
Final Outcome

For all the text which describing the steps, I implemented the new mask function to make them appear from left to right.
After I insert the sound effects, I started doing my editing progress. I placed all of the relevant sound effect into the audio tracks. For certain parts where I couldn't find a suitable voice online, I made adjustments to the sound effects using the following steps:
- Premiere Pro → Audio Effects → Pitch Shifter → Semi tones.
Feedbacks
Week 5
General Feedback: The rhythm of the video should be well-controlled, with a balance between slow and fast pacing. The crucial aspect is to ensure that viewers can read through and comprehend the content presented in the video.
Specific Feedback: The overall progress, particularly for the steps, seems to be too fast. However, the opening scene doesn't need as much time. Mr. Shamsul suggested that the entire video's maximum duration should be 1 minute 30 seconds due to the abundance of steps in my video. I can explore various animation styles to boost creativity.
Comments
Post a Comment