.jpg)
10.10.2023 - 24.10.2023 ( Week 7- Week 9)
Gam Jze Shin / 0353154
Interactive Design / Bachelor of Design in Creative Media
Project 2: Working Web Page
Index
1. Lectures
Gam Jze Shin / 0353154
Interactive Design / Bachelor of Design in Creative Media
Project 2: Working Web Page
1. Lectures
2. Instructions
Lectures
Refer to Lectures.
At first, I created a folder for this assignment and named it as 'Resume code'. Then, I insert all the pictures related in this file.

I saved the icon's pictures that used in my prototype design and convert it into background transparent pictures.

Based on my prototype design, I need to figure out my background colour, font colour and font family. Hence, I checked it in Figma.


.png)

Reflection
Instructions
Project 2
Part 2: Working Web Page
Objective:
- Transform your static prototype from Project 1 into a fully functional and interactive web page. You will apply your knowledge of web layout class to create a working website that closely aligns with your original prototype.
Requirements:
- Review your static prototype from Project 1 and analyze its layout, typography, color scheme, and imagery. Use HTML and CSS to translate the design elements into code, ensuring a faithful representation of the original prototype. Aim for pixel-perfect precision while maintaining responsive design principles to ensure compatibility across different devices and screen sizes. Upload the file in Netlify and submit the link here. Update your e-portfolio with all the processes documented in the blog.
Progress
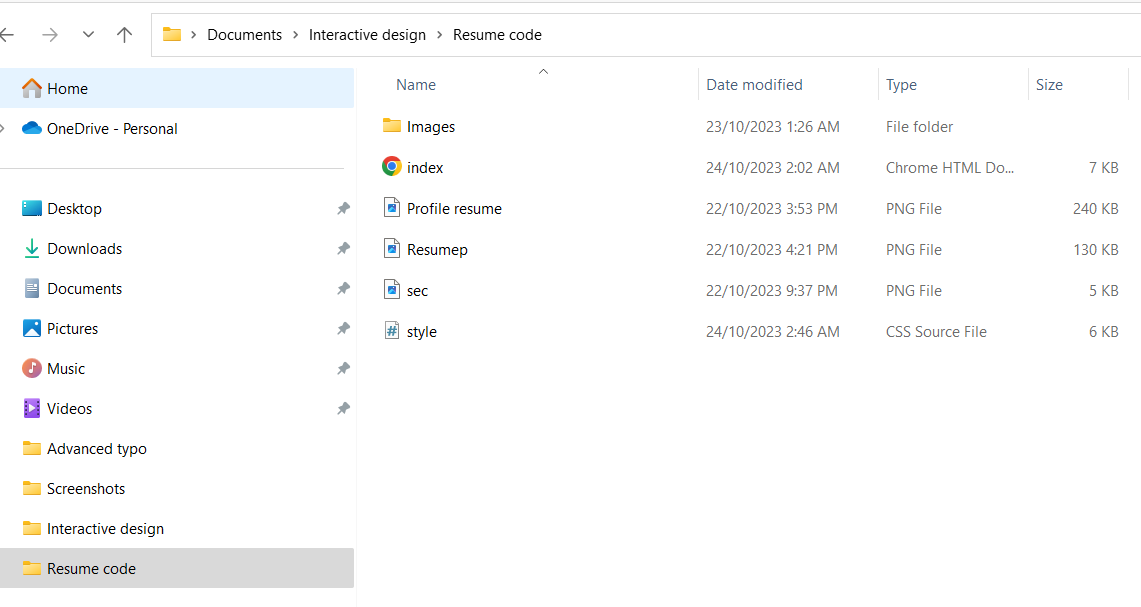
fig. 1.1 Folder created
At first, I created a folder for this assignment and named it as 'Resume code'. Then, I insert all the pictures related in this file.
fig. 1.2 Images needed
I saved the icon's pictures that used in my prototype design and convert it into background transparent pictures.

fig. 1.3 My Resume Prototype
Based on my prototype design, I need to figure out my background colour, font colour and font family. Hence, I checked it in Figma.
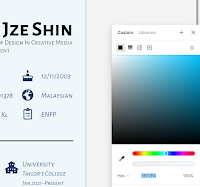

fig. 1.4 - 1.6 Details in
Figma
The background colour is #EFF7FA and the colour of font is
#3A5E8A. The font family I used is
'Alegreya Sans SC.
fig. 1.7 CSS file
After I figure out the design of my
prototype resume, I created a CSS
file for this project and linked it
with the HTML file.
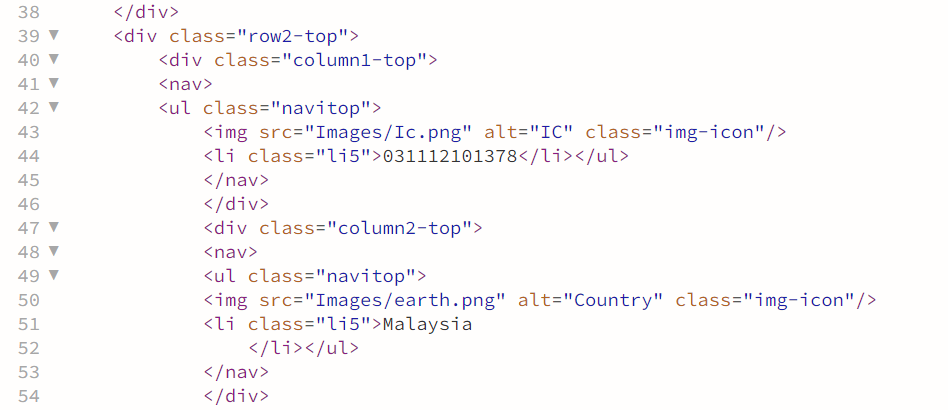
fig. 1.8 - 1.11 Progress in
HTML
Then, I added all the content into
the HTML code by using <div>,
<nav>, <ul>.
fig. 1.11 - 1.14 Progress
in CSS
When I included all the content
needed, I started to style in CSS.
Remarks:
- h1 - My name (GAM JZE SHIN)
- h2 - Subtitle (EDUCATION, SKILLS, WORKING EXPERIENCE...)
- p - Identity (Bachelor of BDCM)
fig. 1.15 Top part for
resume
For the above part of my prototype
design, my self portrait is at the
left, however, the information are at
the right. Hence, I adjust it in CSS.
The width of left part is slightly
smaller than right part.
fig. 1.16 - 1.18 Content part for
resume
As the majority of the prototype
content includes an icon positioned to
the left of the text, I have utilized
distinct classes for styling in both
HTML and CSS.
fig. 1.19 -1.20 CSS in mobile
version
Once I done all the html and css in desktop
version, I tried to adjust it in mobile
version which changing the media's max-width
to 992px and 390px.
Final Working Web Page
Feel free to see my
Resume Webpage.

fig. 2.1 Final webpage - Desktop
version
.png)
fig. 2.2 Final webpage - Mobile
version#1

fig. 2.3 Final webpage - Mobile
version#2
Through this project, I delved into the process
of converting a prototype into a web page using
HTML and CSS. This presented a substantial
challenge for me, as my previous experience
primarily involved using platforms like Wix that
don't require direct HTML and CSS coding. In such
platforms, adjustments to font gaps or page layout
are straightforward through dragging and dropping
elements. However, the transition to HTML and CSS
demanded strict adherence to rules and formats; a
single mistake could disrupt the entire structure.
Despite encountering challenges, continuous
practice and research have contributed to my
growing understanding of HTML and CSS. While
difficulties persist, seeking advice and solutions
from online resources and peers has proven
invaluable. This experience underscores the
complexity of creating web pages with HTML and
CSS, emphasizing the need for persistent practice
and dedicated research for improved results.
Comments
Post a Comment