.jpg)
28.8.2023 - 27.11.2023 ( Week 1- Week 14)
Gam Jze Shin / 0353154
Interactive Design / Bachelor of Design in Creative Media
Lectures
Lectures
Week 1 - Module Briefing
As the administrative error related to module registration, I had missed the first week class. However, I asked my classmates what was going on that day. She told me our first task is doing web analysis and also signed up to Netlify. https://www.netlify.com/
Week 2 - Usability
For this week, Mr. Shamsul talked about Usability: Designing Products for User Satisfaction. Besides, we are divided into groups for class activity. Scenario is given to us and we should design a new interface to solve a particular problem or meet a particular user need by sketching out the design ideas on paper.
Our Scenario: Scenario 1:
Your group is tasked with designing a new e-commerce website for a
local clothing store.
User need: Users want to be able to easily browse and
purchase clothing items online, with clear product descriptions and
images, and a simple checkout process.
Usability principles to consider:
Consistency, Simplicity, Visibility and Error prevention
Week 3 - Understanding Website Structure
In week 3, we learned about website structure. There are three key elements which is header, body and footer.
Header - Top section of webpage. It contains the website's logo, navigation menu, and contact
information for user to quick access to essential information.
Body - Main content area of a webpage. It contains text, images, videos,
and other multimedia elements. Proper organization of content
within the body is crucial for readability.
Footer - Bottom of a webpage. It typically includes copyright information,
links to important pages, and contact details. The footer provides
closure to the webpage and additional navigation options.
We also know about navigation menu which help user move clearly around the webpage.
Activity: Navigation Menu Design
We need to design the navigation menu for a travel agency.
The problem that we need to think:
Identify Main Pages: Within your chosen theme, identify the main pages that your
website would have. These are the primary sections or categories
of your site. For example, a restaurant website might have pages
like "Menu," "About Us," "Contact," and "Reservations."
Design the Navigation Menu:
Using pen and paper or digital tools (if available), design a
navigation menu for your fictional website. Consider the following
elements:
Menu labels: What will each menu item be called?
Hierarchy:
How will you organize these menu items? What will be in the
top-level menu, and what will be in submenus (if any)?
Visual presentation: Sketch or describe how the menu will look. Consider dropdown
menus, hover effects, or any other design elements.
Week 4 - The Web and Language
Week 4, we studied about web standard especially how the web works, structure of the web page and also how pages use structure. Besides, we learned some basic HTML structure and format which will help in our project. After our lecture class, we have our practical class which is writing HTML codes. Mr. Shamsul guided us step by step in order to make sure all of us understand all the step.
Steps to start writing HTML codes:
1. Open Notepad (for window's users)
2. Save it and named as 'index.html' in a new folder.
3. After writing HTML codes, always save it and we can see it
by refreshing the web page. However, did not close the
Notepad.
Beginning of the HTML code:
<!DOCTYPE html>
<html>
Notes:
1. Press 'TAB' - for new lines.
2. Always
use lowercase to write HTML codes.
3. <hr/>
- horizontal line.
4. Blank target="_blank" -
going to new web.
First test in class:


Exercise in class
- Begin by creating a new HTML file and setting up the basic structure with <!DOCTYPE html>, <html>, <head>, and <body> elements.
- Inside the <head> element, add a <title> element with a title for your webpage, like "My Profile."
- In the <body> section, create a header section using the <header> element. Add a main heading (<h1>) with your name. Optionally, include a subheading (<h2>) with a brief tagline or description.
- Create a section for information about yourself. Include a <h3> heading saying "About Me." Add a couple of paragraphs (<p>) with a brief introduction of yourself.
- Create another section to list your interests or hobbies. Use an appropriate heading, such as <h3>: "My Interests." Add an introduction for this section using <p>. Create an unordered list (<ul>) and list some (more than 3) of your interests using <li> elements.
- Insert an image of yourself using the <img> tag. Specify the image source (src attribute) and provide a brief description using the alt attribute.
- Create a contact section with an appropriate heading. Include your email address and optionally other contact details like your social media profiles or phone number using the list item.
- Test your webpage by opening it in a web browser to ensure everything displays correctly. Use online HTML validators to check for any syntax errors and fix them if needed.
- If possible, publish your webpage online using a free web hosting service or GitHub Pages.


- Window > properties > check what can do (change sizes...)
- Choose standard view in Adobe Dreamweaver
- Open one folder
- Manage sites> new sites> click folder icon> choose file> save> see related file in right side> click and drag the image in design view
- border means 边框
- background-image:url("My pic/pexels-serinus-5149246.jpg");
background-size: cover;
background-attachment: fixed;
- body {
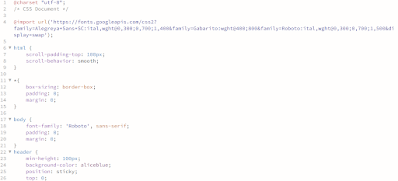
Following Mr. ShamsuI's instructions, we adding background colour, different type of fonts and different style of text (shadow, size, colour...) by using Adobe Dreamweaver.


Week 6


- Include attribute between opening tab
- All should be nested
- bnt=button
- img= image
- save css file as style.css
- Class selector use .
- Id use #
- think about mobile first> web design
- responsive to other device
- <meta name="viewport" content="width=device-width, initial-scale=1.0">
- first div called 'container'
- must follow the order!!!
- a: link (appear)
- active (click)
- hover (touch)
- visited
This week's lesson covered various positioning techniques, including sticky, static, relative, absolute, and fixed.


- Use absolute to insert video
- <video control autoplay src....>
- position-fixed for below right button
- vh= vertical horizontal
- for very long gap at below of device
- section min-height 100vh
- sticky= stick on the top if scrolling down
- apply z-index (depth) (bigger z-index, it will at the front)
- z-index: -1 (back)
- z-index: 1 000 (front) *depands
- height of the logo <150px for logo
- px is a fixed value, use em (1.25em) in navi a:link
- nav. active
In this week's session, Mr. Shamsul illustrated the process of crafting a gallery of photos on the website.

- lightbox photoGallery
- java script need to be the bottom, all the things must before script
- need to add !important
- For video background: z-index: -1 (back) 1 (front)
2.Moodboard - miro/ google slide
- Colour Palatte
- font choice
- header
- body-naxi
- no need use colour - grey scale
Instructions
Exercises
Exercise 1: Web Analysis
Choose TWO (2) websites from the
link given. Review the website that we've selected
carefully. Write a brief report summarizing in not more than
500 words. We can include a screen capture of each section or page
of the website to explain and make sure that the formatting of the
report is clear (heading/subheadings).
What To Have in The Analysis:
- Purpose and goals - Are they effectively communicated to the user?
- Visual design and layout - What use of color, typography, and imagery?
- Functionality and usability - Navigation, forms, and interactive elements?
- Quality and relevance of content - Accuracy, clarity, and organization?
- Website's performance - Load times, responsiveness, and compatibility with different devices and browsers?
- Using software such as Photoshop or Adobe Illustrator.
- Use any image from stock image or free stock icon. Free image: https://www.pexels.com/
- Use similar typefaces/fonts from Google Fonts. Google Fonts Link: https://fonts.google.com/
1. Ocean Health Index https://www.oceanhealthindex.org/?authuser=0


Reflection
Comments
Post a Comment